
Outlook Email Encryption Security Guide
Following are instructions on how to encrypt any UHS (@central.uh.edu, @uhcl.edu, @uhd.edu, @uhv.edu) email using Microsoft Outlook. The emails are encrypted in transit and at rest in the recipient’s mailbox, including any attachments. Recipients cannot remove the encryption, so forwards and replies to the email remain encrypted.
Email Encryption Options
Outlook 365 for Windows, Outlook 365 for Mac, and Outlook on the web provide several encryption options:
- Encrypt-Only – The message is encrypted in transit and at rest in the recipient’s mailbox, including any attachments. Recipients cannot remove the encryption, so forwards and replies to the message remain encrypted.
- Do Not Forward – The message is encrypted in transit and at rest in the recipient’s mailbox, including any attachments. Recipients can read this message but cannot forward, print, or copy content. The conversation owner retains full access to their messages and all replies.
- <University Name> – Confidential – The message is encrypted in transit and at rest in the recipient’s mailbox, including any attachments. This content is proprietary information intended for internal recipients only. External recipients will not be able to open the message.
- <University Name> – Confidential View Only – The message is encrypted in transit and at rest in the recipient’s mailbox, including any attachments. This content is proprietary information intended for internal recipients only. External recipients will not be able to open the message. Additionally, this content cannot be modified, copied, or printed.
How to send encrypted emails:
Outlook (PC)
- Click on "New Email" to create a new email.
- Click on the "Options" toolbar at the top of the window.
- Within the "Options" toolbar, locate and click on the "Encrypt" menu.
- From the menu, choose an option that best suits your needs.
- Compose your email as usual.
- Once you are ready to send, click "Send"
Outlook (Mac)
- Click on "New message" to create a new email.
- If it's your first time setting up encryption, follow these additional steps:
- Click on the three-dot icon (...) and select "Customize Toolbar"
- Locate the "Encryption" icon and drag it to the toolbar at the top of the window.
- Click "Done" to save the changes.
- On the toolbar, click on the "Encryption" icon.
- From the Encryption menu, choose an option that best suits your needs.
- Compose your email as usual.
- Once you are ready to send, click "Send".
Webmail
- Click on "New Mail" to create a new email.
- Look for the "Options" toolbar or menu at the top of the email composition window.
- Within the "Options" toolbar or menu, locate and click on the "Encrypt" option.
- From the Encryption menu, choose an option that best suits your needs.
- Compose your email as usual.
- Once you are ready to send, click "Send".
FAQs
Do I need any special software to send or receive encrypted emails through Microsoft Outlook?
No. The Microsoft Outlook encryption feature is seamlessly integrated into the email system, ensuring a user-friendly experience. Please follow the instructions above for your specific email client.
How will the recipient know they have received an encrypted message?
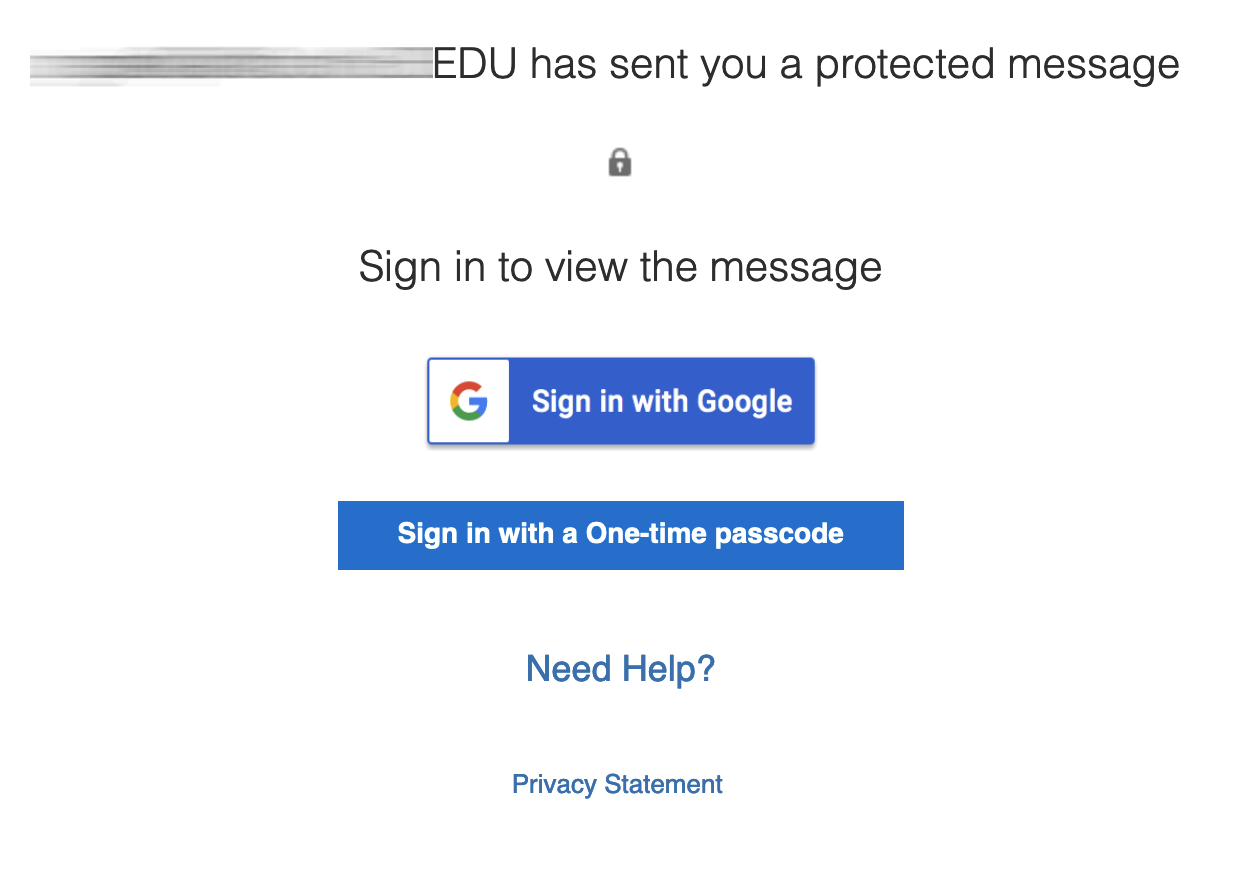
If the recipient uses Microsoft Outlook (e.g., desktop client, webmail, mobile app) the encrypted email will be delivered in its entirety directly to their Inbox and will be marked as encrypted with a lock, or a heading in the message that state the Encryption option chosen by the original sender.If the recipient uses any other email client or online email provider, the recipient will receive the following email and will need to click on “Read the message.”

Next, the recipient will need to either sign in with the email provider ID listed in the message or a one-time passcode.
How can a non-UHS user send me an encrypted message?
Non-UHS users must first receive an encrypted message from a UHS user from their university email address. All subsequent replies from the non-UHS user to that original encrypted message will be automatically encrypted.
For questions related to secure email, please contact UHS Information Security at
| University of Houston | security@uh.edu |
| University of Houston - Clear Lake | security@uhcl.edu |
| University of Houston - Downtown | security@uhd.edu |
| University of Houston - Victoria | security@uhv.edu |